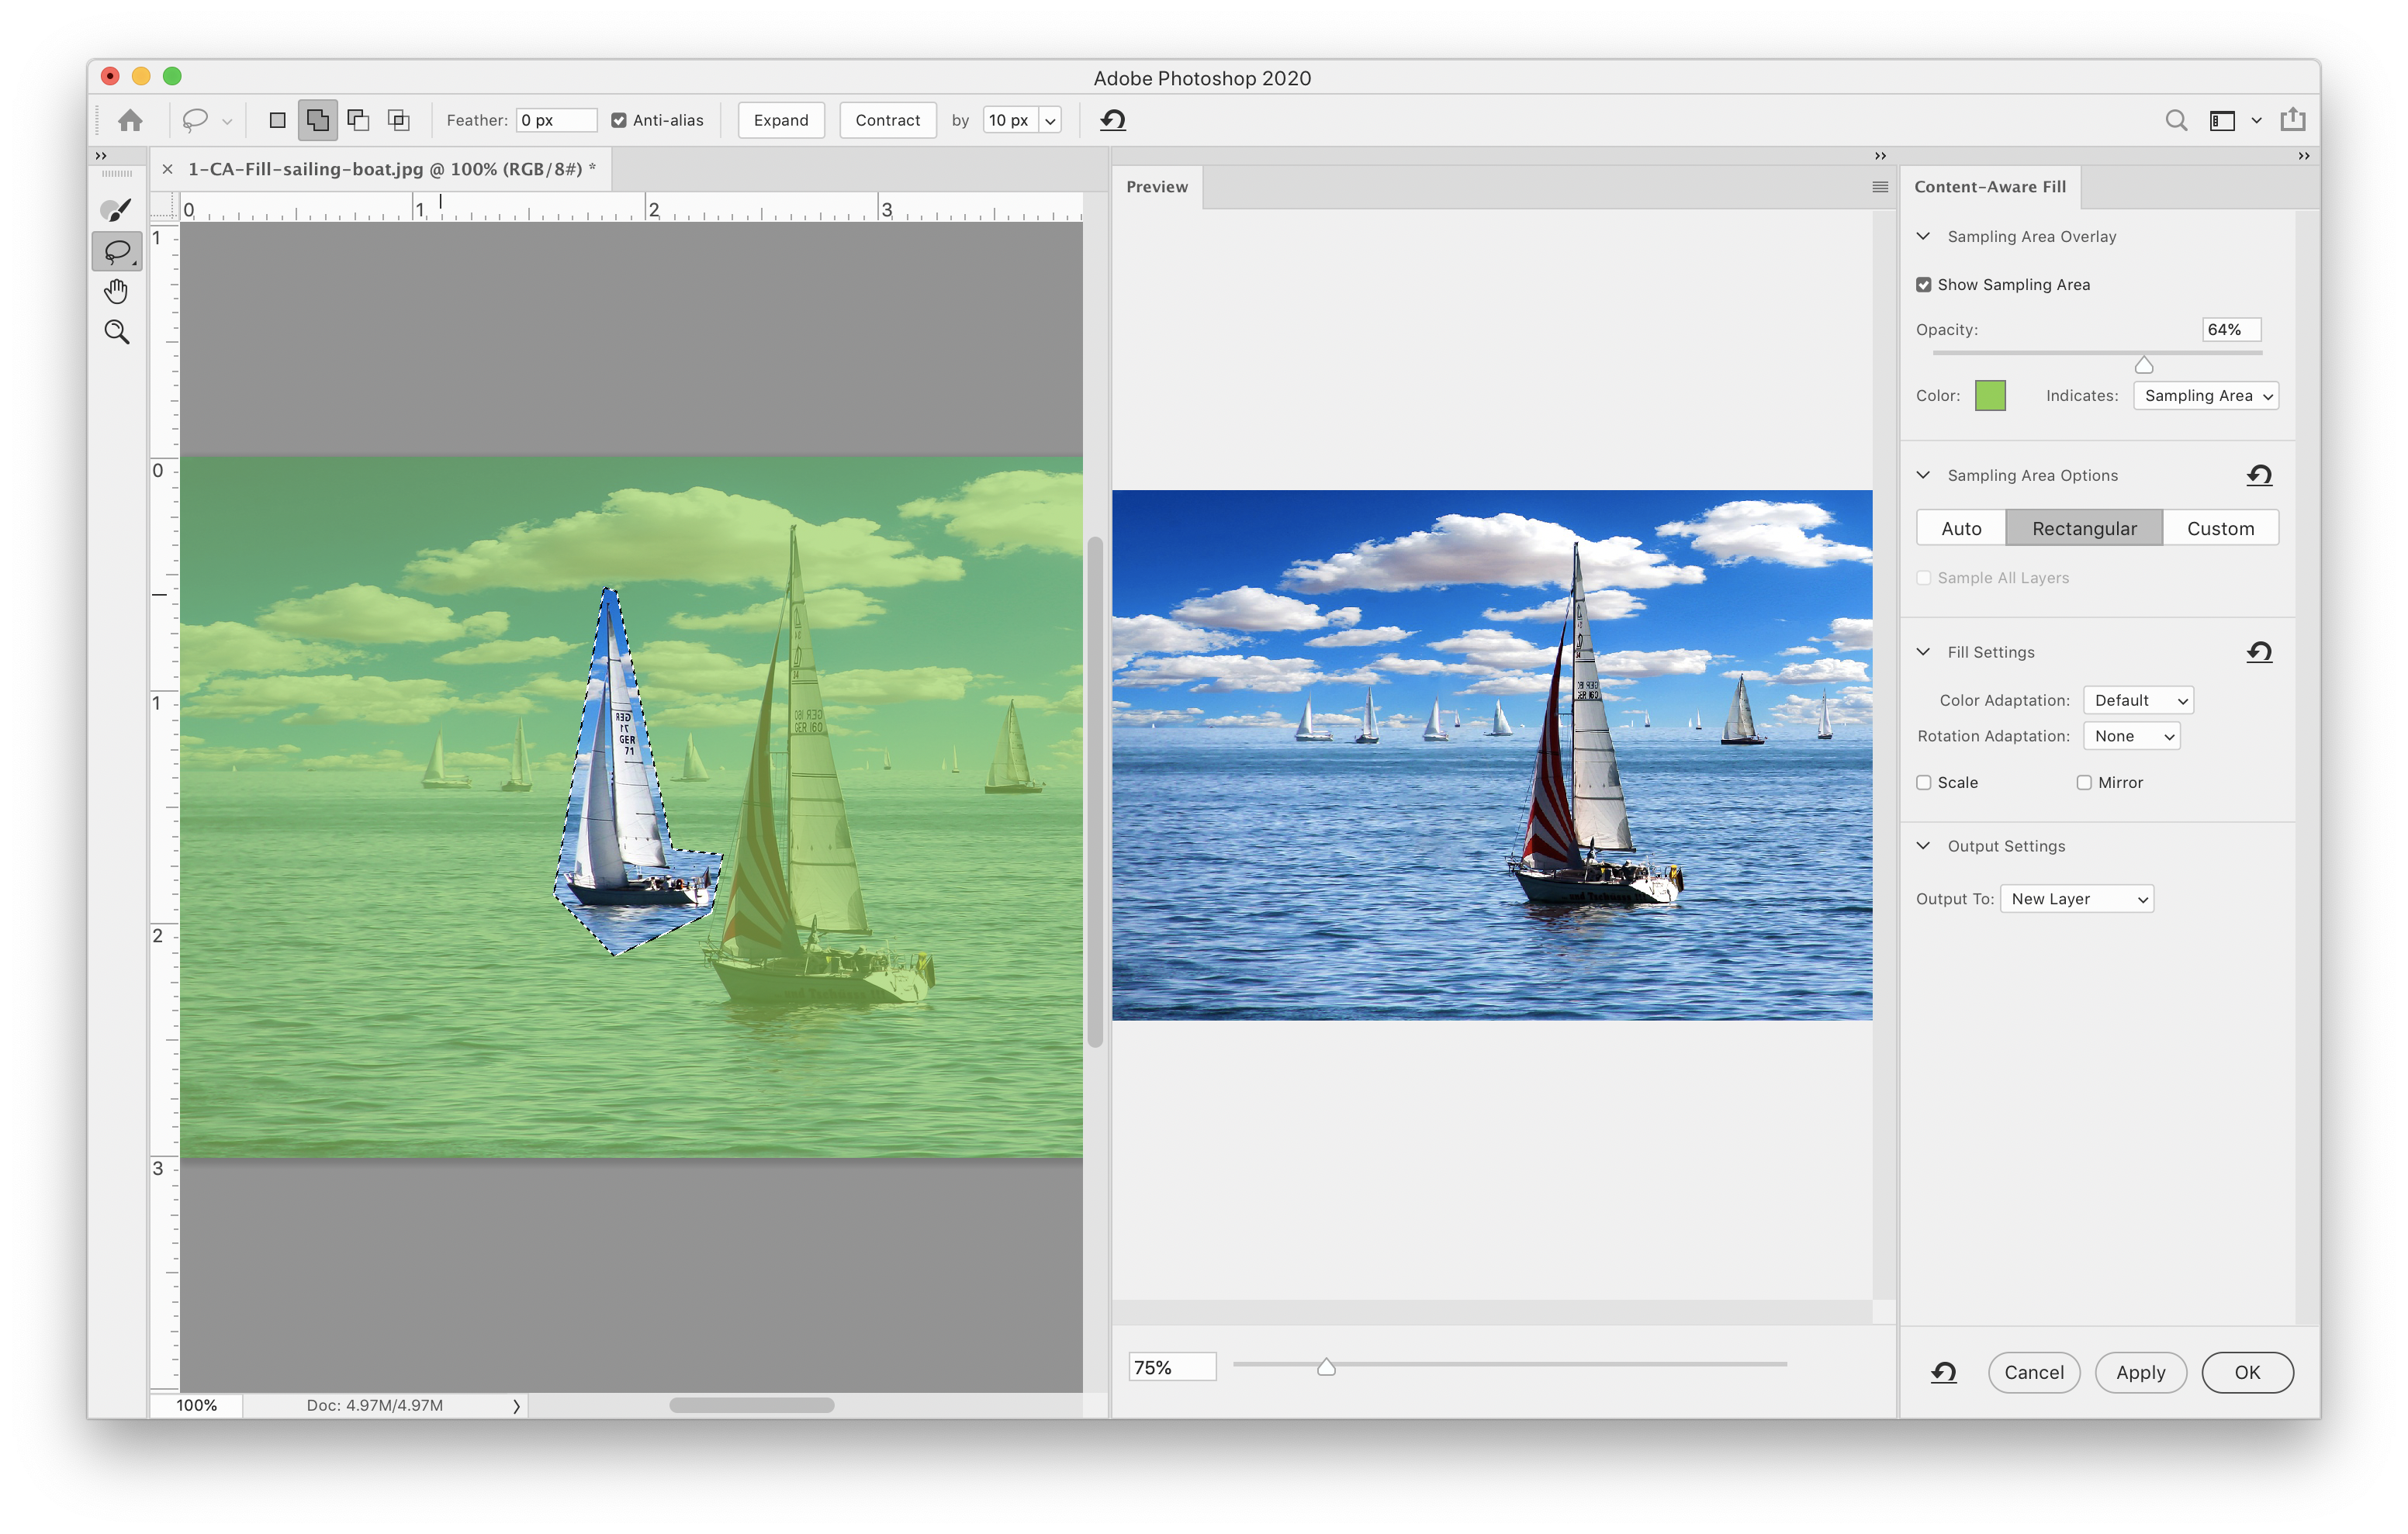
Enhanced Content Aware Fill
Content Aware Fill was added to Photoshop way back in CS5 [2010], but it sometimes returned unexpected results. The updated Content Aware Fill workspace gives even more control than when it was first introduced in CC 2019. Make a selection of what you’d like to remove, then:
Edit > Content Aware Fill
- Tools – Sampling Brush Tool (B) controls what is being sampled. Lasso Tool (L) controls what is being replaced. Hand Tool (H) and Zoom Tool (Z)
- Sampling Area is defined by colour and opacity [set in right side panel] and can be edited using the Sampling Brush. Hold option/alt to remove from the sampling area.
- Preview panel – shows the potential results, based on the current settings
- Use the Lasso Tool to add/remove from selection, modifying the area to be replaced. [shift adds to selection, option/alt removes from selection]
Sample Area Options
- Auto ‘guesses’ what you’d like to sample, Rectangular samples from a rectangle based on the size of your selection, Custom is based on an area defined by painting with the Sampling Brush
Fill Settings
These settings can dramatically effect the way the selection is filled. The best way to see what they do is to experiment and watch what happens in the Preview area. Rotation, Scale and Mirror are especially useful when you’re removing something in an organic background.
Output Settings
It’s never a good idea to output to the ‘Current Layer’ [destructive], ‘Duplicate Layer’ does what it says and applies the edit to a copy, but ‘New Layer’ offers the most flexibility.
Apply vs OK
This is one of the best enhancements. Rather than having to return to this interface to go through the entire process again, you can simply hit ‘Apply’ and make a new selection. Note: each click to the Apply button generates a new/duplicate layer.


